Pages

Showing posts with label DIY. Show all posts

Thursday, 14 November 2013

Let there be light!


Well the title says it all really. Last weekend, with the help of Steve, we built a lamp! I'd been wanting to DIY a lamp since seeing a post on Pinterest where a lady had constructed her own lamp from a water jug. I have been scouring ebay and antique stores for something similar and it was at Paddington's Antique warehouse where I spotted this amazing vintage soda stream. 

For a tidy $30 I purchased the heavy soda vessel. I really liked the industrial feel of the steel criss-cross effect on the outside but my favourite part was the attachment at the top. 

I'd done a little research to find a DIY lamp kit and found Bunnings sold pendant light kits but I not the simple lamp kits. By a happy coincidence I stumbled across a Beacon Lighting store and it was a case of ask and yee shall find! For about $30 a got a clear lamp cord, bulb kit, bulb and lamp shade. 


I needed Steve's help with the assembly of the lamp as we decided to cut into the top to affix the lamp shade.


Cue the power tools....

Now Steve will find just about any excuse to use power tools. If you were making a lamp out of a water jug or vessel with an easier opening there would be no need for power tools at all. 


Once he grinded away the top disk, it was just a matter of cleaning out the inside mechanisms with a drill to make room for the lamp cord. 

The next fun part- drilling into the glass bottle to make a hole to pull the cord back out to plug into the wall. This is not an essential step if you have a vessel with a wide opening. You can simply fold the cord back out the top and hide it behind the jug, especially if you have purchased a clear cord kit.

Of course this step was reason enough for Steve to go out and purchase a glass drill bit. Determined not smash the glass he practiced on a wine bottle. 

Drilling into glass is best done at a low speed, and by low I mean really low! Patience is definitely needed at this point. 


We may have been a little over-paranoid but this step still took a good 25 minutes as the bottle was deceivingly thick- about 15mm thick!


Once the hole was complete it was very simple. Thread the lamp cord through the bottom hole and up towards the top. With a little help from a coat hanger the cord was through. With our lamp base it was a matter of loosening two screws to place the copper electrical ends into the base and then tightening them. Then place the lamp shade over the base, plug in the light bulb and voila! 

LIGHT!


I'm not ashamed to say I did a happy dance when it all came together! It looked so great! 


We'll admit it was slightly over-engineered with drilling into the top soda stream fastening but I'm so glad we did. The industrial look gives it a really masculine, chic feel. Which is perfect, as Steve has laid claim on the lamp as his bedside light!


Without the power tools steps this project would actually take no longer than 10 minutes. If you have a water jug, demijohn, or a great vessel that you want to up cycle - DIY a lamp! You won't regret it!

Friday, 8 November 2013

I now pronounce Mr and Mrs Holtam!

It's been a little too long between posts on our blog, but we've been very busy in the lead up to my older sister Sarah's wedding.

She and her fiance Ben flew home from London to be married at Banglow Guesthouse in the small town of Banglow, nearby Byron Bay. It was a picturesque setting alongside a creek, with the ceremony taking place under a mulberry tree.

The entire event was dreamed up by the couple, from the invitations to table settings, decorations and menu. The reception was held at the same venue in a marque under the stars. The food was provided by award winning restaurant Harvest. The day couldn't have gone as smoothly without the dedicated work by her wedding co-ordinator and friend Elizabeth Stirling White.


Despite the nerves before making her way down the aisle, the wedding went off without a hitch. The guests were in high spirits with everyone in the mood for celebration.


I'm so happy for Sarah and Benny but I'll be sad when they return to London for their life as newlyweds.

I couldn't have imagined a more perfect day standing beside my sister as her bridesmaid to see her marry the man of her dreams.


Saturday, 6 July 2013

Styling from A to Z

For those who know me well, know that one of my very favourite things to do is to escape through the pages of a good novel. My parents tell me that I've always loved books- even before I could read. And it's probably the reason why I collect books. I can't bare to throw them out after I've read them. I not only keep the books I've read but especially enjoy collecting antique books. I tell Steve the reason we have to store boxes and boxes of old books is for my dream to one day build a library in my house (emphasis on the dream).
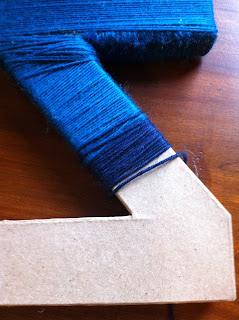
I often think about the first pair of bookends my grandmother gave me when I began reading in grade 1. It was a pair of wooden bookends shaped like little ponies. Now I outgrew my pony phase by about age 10 and have never found a replacement. I discovered a project on Pinterest that inspired me to create some A and Z letters as bookends.


Spotlight again proved fruitful for finding supplies including paper macho letters "A" and "Z" and wool that was needed. I wasn't sure on the colour I wanted and after a lot of umming and aching I decided on a navy blue and lighter teal colour in the hopes of making an ombre effect- starting with the lighter colour working down to the darker colour.

As the letters were three dimensional a little creative wrapping was needed.


When switching the colours, I wanted to create a bleeding effect so I was happy to have some of the darker colour mixed into the lighter.


It took about half an hour each letter- adding on a little extra time to take pictures- but it was a very easy afternoon project. I was pretty happy with the final project but I would maybe have switched to white craft glue rather than hot glue gun as it got a little messy with the threads of glue and fibres from the wool.


They may not be family heirlooms in the making but they have added some great colour and a little fun to our room. 


Monday, 24 June 2013

Google is a wonderful thing...

I often wonder what my life would be like if there was no such thing as google. I would never have discovered why the sky is blue, how cameras work (but seriously I still think it's magic), the ever-addictive Facebook, my ultimate time waster Pinterest and the dozens of blogs that I read from authors around the world.

It was during my daily morning blog read that I discovered an interesting article about a design workshop that's coming to Brisbane. The School with Megan Morton  offers tuition from the best-of-the-best craftspeople inside the industry and gives an insight into the coveted worlds of craft, styling and design. Crafternoons and make-it-yourself lessons from specially selected teachers are structered with all levels of experience in mind.

One of the clases I was particularly interested in was a screen printing class by Rachel Castle. A little googling helped me to discover a little more about her and quickly I entered the wonderful world of Castle and Things.


Sadly for me, the class is only being offered in their Hobart Roadshow, but I'm going to keep my eyes peeled in the blogger world for more upcoming dates in the hopes I may learn how to create some of these pieces myself.


**I've created a link to my favourite blogs on the right hand side of the page. Check them out and you might find something you like! **