Pages

Showing posts with label crafts. Show all posts

Wednesday, 26 June 2013

From cheap to cheerful

I've had a small collection of magazine pictures and ads in a box beside my bed for some time, and I thought it was about time I did something with them. And a particularly fruitful visit to the local dollar store provided me with the perfect opportunity.
I bought a couple of cheap photo frames that I thought I could unify with a little white spray paint and create a cluster of pictures on an empty wall of our room.


Thankfully I had some leftover spray paint from the last project, so this is going to be turning cheap into cheerful! It only took two coats and about an hour to dry and voila!


I decided to upgrade the frame from my paint chip wall art I created about a month back so that everything was matchy-matchy!


I should have waited until it was morning to take these pics as the light isn't great in our room, but I think you get the picture (pun intended). I highly recommend using cheap frames over buying a match set. In contrast I bought my holiday picture frames from Freedom for $60, and these three frames cost half of that, including the spray paint!

Monday, 27 May 2013

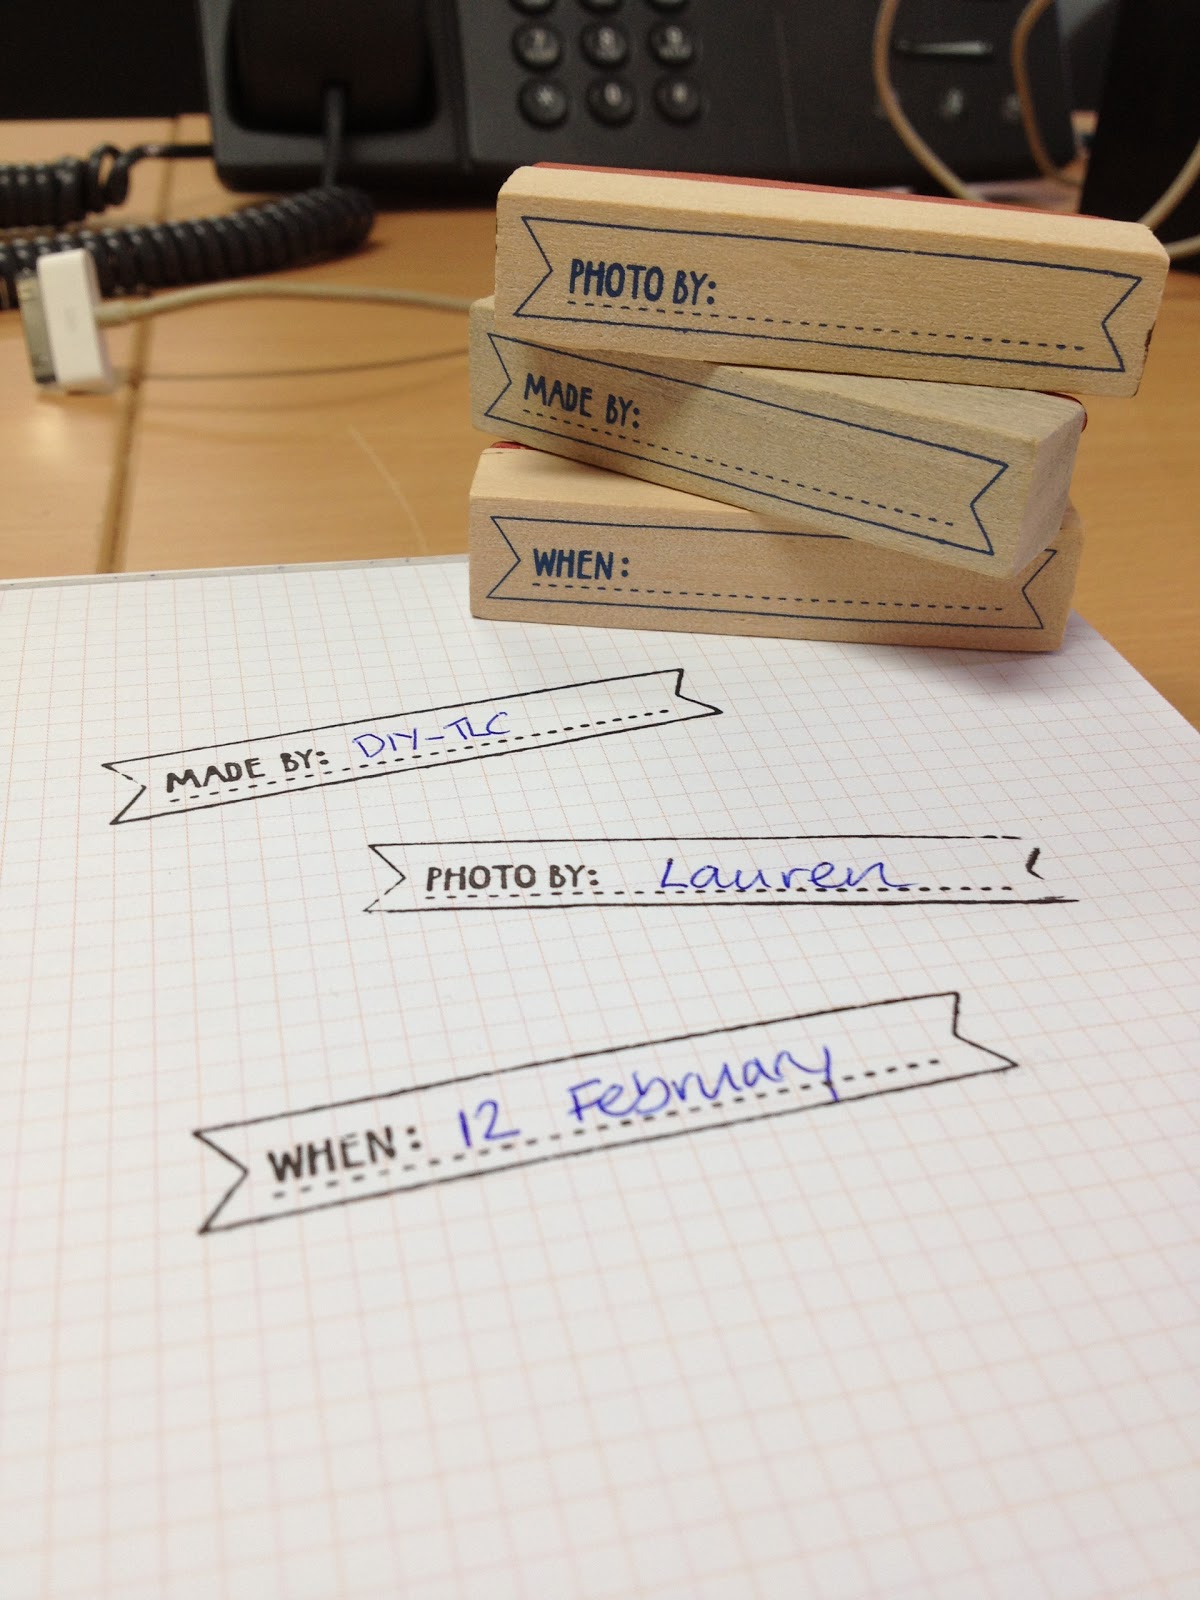
Leaving my own stamp

I'm the first to admit that I have a little bit of an obsession with stationary. Cute paper, pens, note pads, and my new love stamps! I recently bought these lovely stamps from Kikki-K and thought they might come in handy for labelling the holiday snaps I recently printed.


And the best news is they will compliment the collection of stamps I already own (I did admit I have an addiction). I used them for Christmas gift wrapping last year. Simple brown paper and hand-printed labels really gave the personal touch I was going for. I also secretly love gift wrapping too. I will, however, draw the line at adding a gift wrapping room to our new house. I am in control of my vices, I swear!


Wednesday, 22 May 2013

Cheat's Way Out

It's been well over two months since Steve and I came back from our whirlwind holiday in the New York and Canada. So it's a little embarassing to say we haven't even printed our holiday snaps, let alone hang them.
So I popped off to Harvey Norman to have the pics printed for a bargain price of $8 for about 20 of the best ones! And the best part was it only took 10mins. Gone are the days of dropping off a roll of film and coming back 24 hours later, only to discover all your pictures have your thumb smudged across them.

Doing some research I thought Ikea would be the way to go for pictures frames, as I was looking for a range of sizes and with white frames. I struck gold however at Freedom Furniture who were selling ten frames for $80, but I timed my shopping trip perfectly with a 3 day sale and got them for $60!


So pretty, right?

I've always been really bad at hanging pictures and getting them straight. But I found a really good idea on Pinterest to get a cluster of pictures looking just right.


I popped the photos in their frames and  lay them out on some newspaper, finding the arrangement I wanted and traced around them.


It was just a matter of cutting out each little square and then taping the newspaper to the wall where I wanted them to hang. I used my handy spirit level app on my iPhone to get the paper straight, so as long as it was right, the rest would be.
Putting a little pencil mark where the hook would go on the wall, it was then simply a matter of placing the adhesive command strip hook on the wall and attaching the photos into the cut out hole.

...excuse the messy bed. There was a lot of jumping around on it after I succeeded!
Voila!

Monday, 6 May 2013

Call Me Martha


I'm not sure why but Sundays always feel like creating days. Inspired by a friend's post on instagram and eyeing off some amazing chevron cushions online- I decided I'd make some cushions for our bed, and in the spirit of saving I'd do it all by my lonesome. 


Only problem... I don't know how to sew. Never blessed with the sewing gene as my sister Sarah was, I took to Pinterest to hunt down "no-sew cushion covers". And hooray I found some- so off to Spotlight I go. 

Slightly overwhelmed and feeling out of my depth I was forced to stop and ask for directions very early on. I sort out a hipster looking attendant, as I thought she would secretly be impressed by my no-sew idea- and would also know which material would suit best. Turns out- cushions can be made out of just about anything. Go figure!

I hunted down three cushions, three super cute designed fabrics and the secret ingredient- iron on hem tape. 
I cut two pieces of material about 3cm larger than the pillow. I then cut out four strips of the iron on tape per pillow that measured the exact length of the pillow.  
I then lay out three of the strips of tape onto the printed side of the material- ensuring to leave one side of the square free which would act as the opening. Using a warm iron on the wool setting I ironed over the paper side of the tape.
Allowing them to cool completely- this didn't take long- I took off the paper strips.

You could make out a clear line of glue. Grabbing the second piece of fabric- print side down- I proceeded to iron over the material again.

After it cooled was the tricky part. You had to turn the cushion cover inside out and then stuff the cushion very carefully into the cover. I will admit the first time around I pushed the cushion in a little too hard and the glue pulled. But that just ment I had to cut another piece of iron on tape and redo that section.

At the top of the cushion you have to fold down either side of the material to create a clean finish. Then like before, I used the iron on tape and ironed it. I pulled off the paper, and then carefully lining up the edges I ironed over the tape to close off the cushion.

Closing up the cushion was by far the hardest part. I'm not a perfectionist at heart but I really had to try my hardest to ensure the cushion had a neat close.

One cushion down, two more to go. 


Steve (patient boyfriend) did get quite a laugh out of how excited I was at creating the cushions. I was very proud that a non-sewer could still make a great looking cushion. I highly recommend trying it for yourself.

And overall, three cushions, material and iron on tape ended up costing $50. Now I just have to convince Steve that spending money actually ment we were saving money!